- Effective collaboration with your social media team on Planable
- Adding and managing team members on Planable
- Collaborating on social media content creation
- Post views on Planable
- Planable mobile app
- Customer support
- Planable pricing
- Conclusion
- What's changed by 2026: AI in social media team workflows
- Want more on this topic?
- Frequently asked questions
Last updated: May 2026. Originally written for 2022, this guide has been substantially expanded with a new section reflecting the 2026 landscape.
Collaboration has always been a big issue in workplaces. That’s why businesses are constantly looking for innovative ways to ensure collaboration between employees.
Frankly, poor collaboration can lead to losses for a business.
On the other hand, effective collaboration can lead to better business results. Like other aspects of business operations, teamwork is vital in social media marketing.
Whether you’re creating social content as a team or for a client, you need contributions from other people. This could be in the form of comments, copy, media files, and more.
For most social media teams to collaborate today, they need a dedicated collaboration tool. Luckily, with Planable, you can plan your social media content and collaborate in the same place.
How does Planable achieve this? I’ll be going into greater detail shortly.
Effective collaboration with your social media team on Planable
Working in a social media team can take a lot of time. Even more, it can be stressful.
How can Planable make collaboration with your social media team easier? Or how does this tool make working with your client more efficient?
In a moment, this review will answer these questions.
Once you log in to your account, the first task to do is to create a workspace.
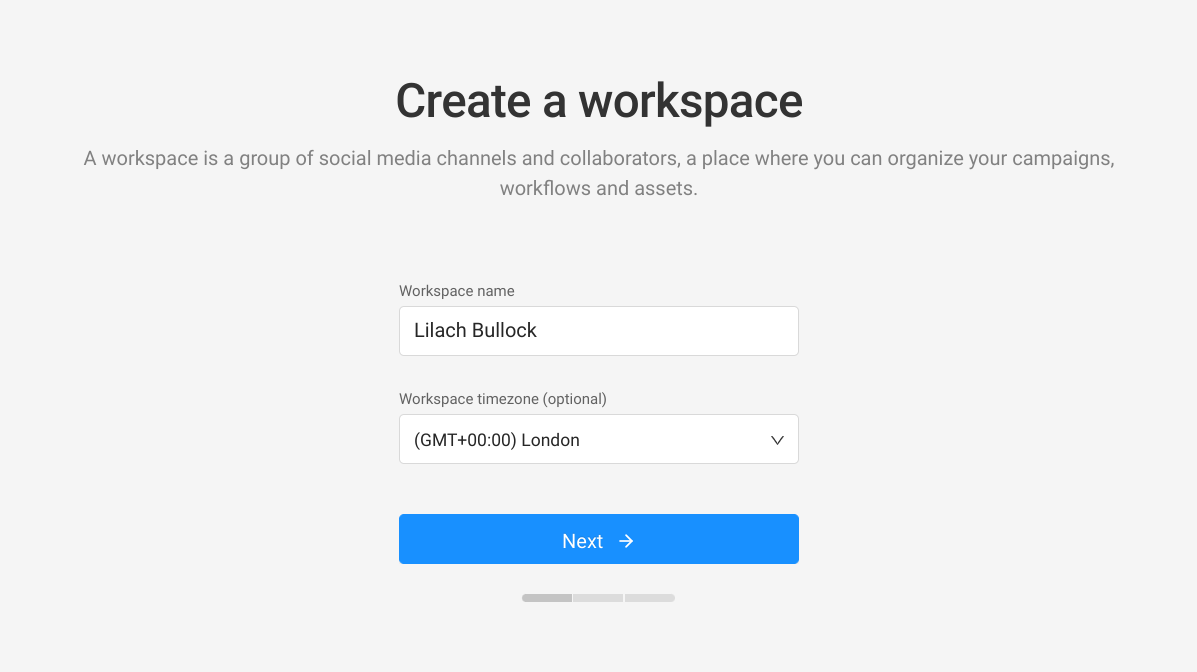
Click on “Create a Workspace” in your dashboard. Once you do that, Planable will load the next page where you can enter the workspace name and your time zone.
On the next page, you can connect your social media accounts to this workspace. Currently, Planable allows you to connect Facebook, Twitter, Instagram, LinkedIn, YouTube, TikTok and Google My Business accounts to your workspace.
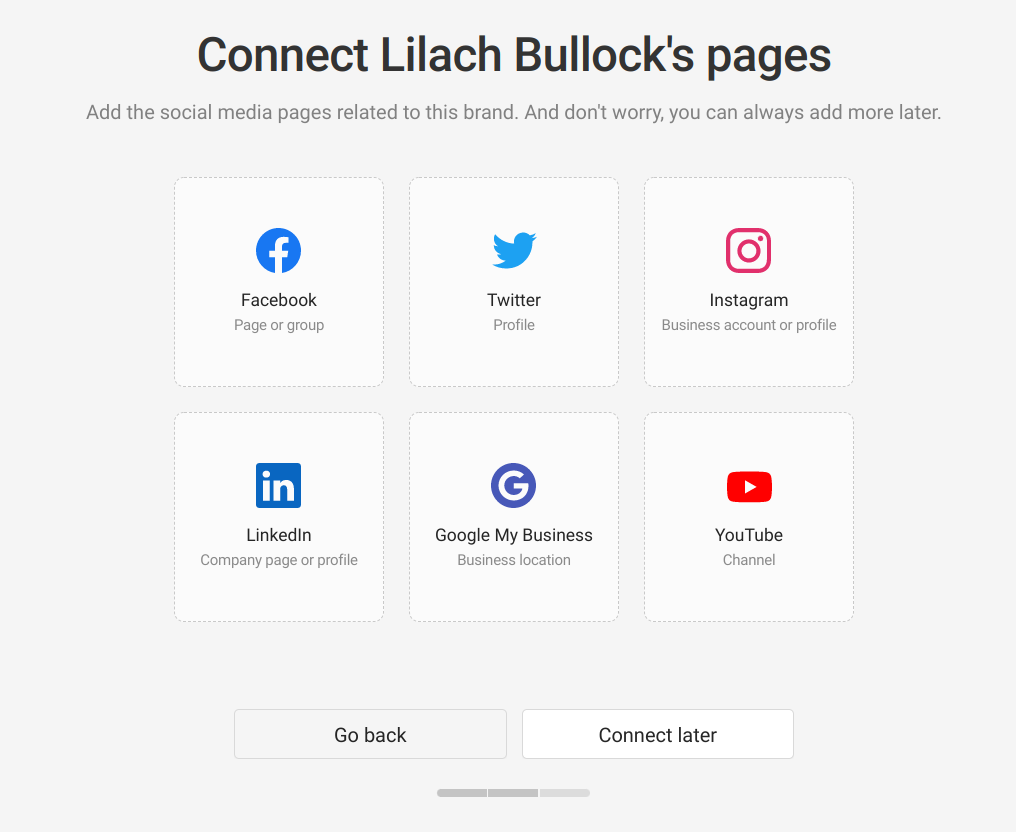
You also have the option to connect later. After doing that, you can set up your approval workflow for social media posts. This displays different levels of approval requirements depending on your needs.
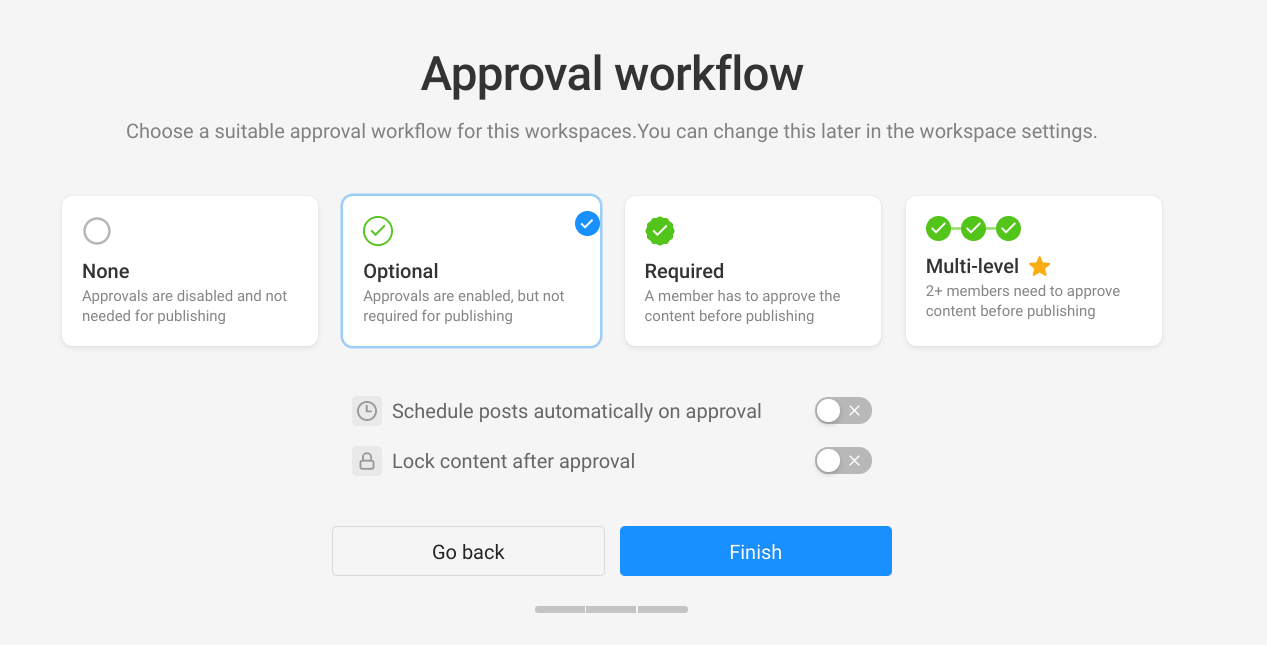
If you select “None,” it means approvals will be disabled on your posts and are not required for publishing. “Optional” enables approval but without making it compulsory while “Required” makes it compulsory.
In a case where you want approval from both the team head and client before publishing, select the “Multi-level” option. The content goes automatically through multiple approval stages, notifying each reviewer when it's their turn to give the greenlight.
Then, click on “Finish” to complete your workspace setup. Now that you’ve set up your workspace, you can start collaborating with team members.
Adding and managing team members on Planable
While running your social media campaigns, you need to publish posts. Ideally, you need to collaborate with your team members during this process.
In some cases, you need to collaborate with clients if you’re running campaigns on their behalf. To add team members, navigate to the top left corner of your workspace and click on the “+” icon.
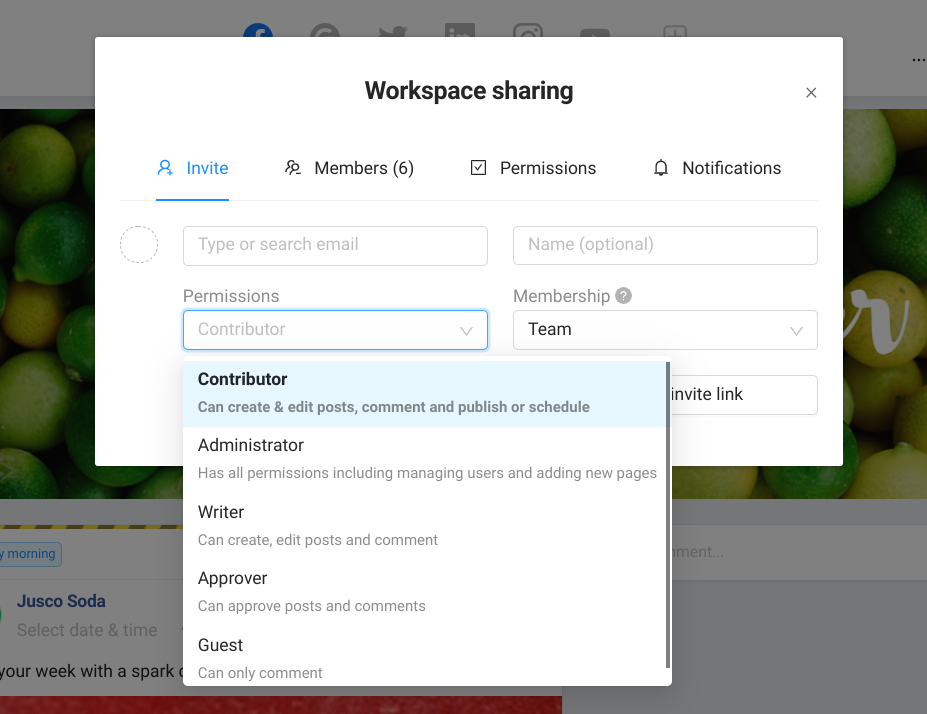
Here, you can enter their email and name. Beyond that, it’s easy to set permissions and add them to a membership category.
With the permissions, you can define roles for the new member. Membership allows you to indicate whether the person is a team member or a client. Being a client means they have no access to private team posts and internal notes. 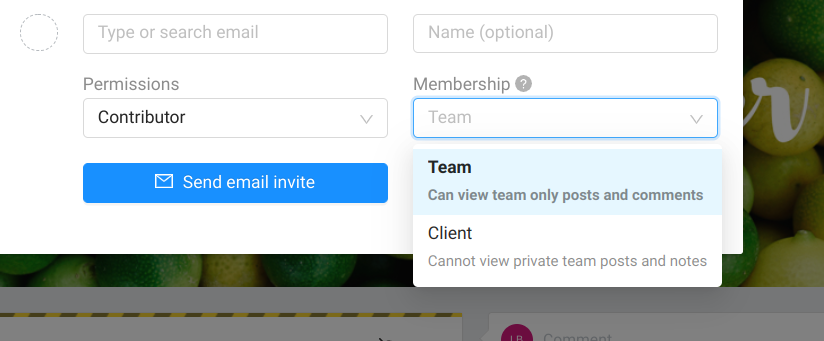
If you want to share your workspace with someone outside Planable, click on “Create invite link” and share the link with them. This way, it’s easier to get them to register on Planable.
To see the members already in your team, click on “Members” at the top of your popup.
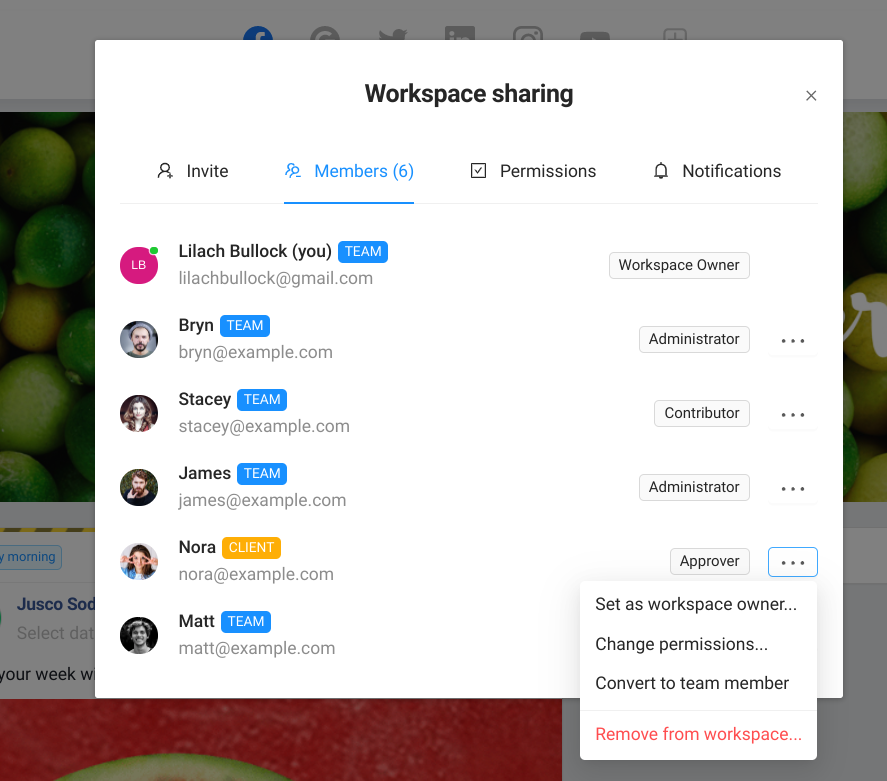
Here, you’ll see each member and their role. You can also change their role and membership status by clicking on the 3 dots beside their role.
Another important task to execute here is to set permissions. When you click on “Permissions,” you can assign tasks that a team member can execute in the workspace.
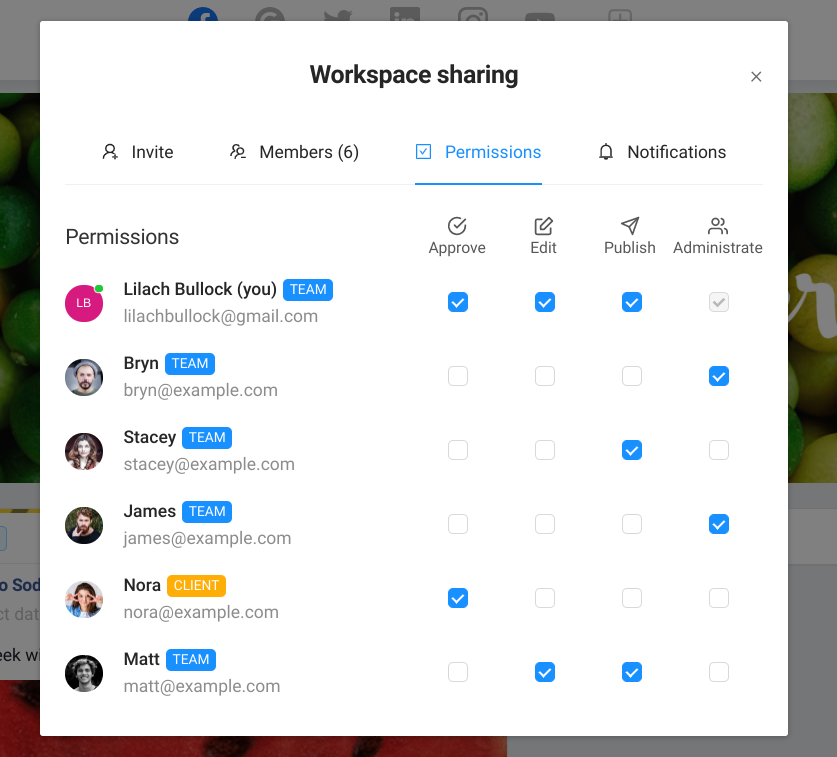
Beyond permissions, you can set up notifications for specific activities in your workspace.
Collaborating on social media content creation
On Planable, there are tools to help create your social media posts in one place. In addition to that, you can collaborate with other team members and take their feedback.
To create a post, click on “Compose” at the top right corner. Once you do that, a popup will appear to create your post.
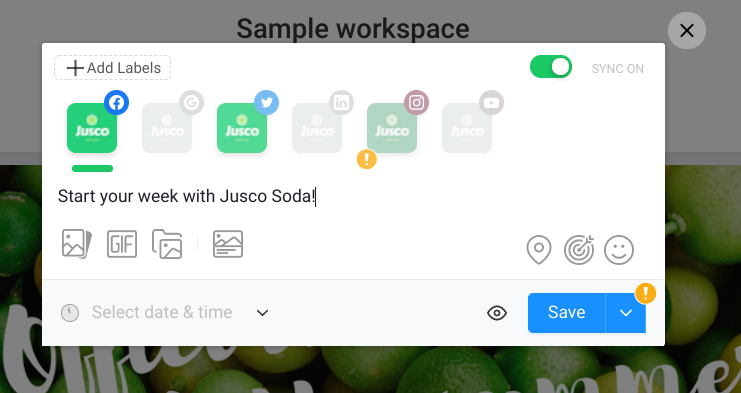
Here, you have many options for your post. First, you can publish to all your social media accounts at once.
With the sync on, you have the ability to create your post once for multiple accounts. You can also customize your post for each social media network.
In that case, all you need to do is switch the sync off and edit the post for each platform. Apart from this, you can upload images or videos from your computer by using the icons below the post.
Furthermore, you have the option to upload images, videos, or GIFs from your Planable media library. If you’re posting on Instagram, you’ll love the ability to add carousels.
When I selected the option to add from the media library, the files show up at the right sidebar. If you need some media files in future posts, hit the “Upload” button to add them to Planable.
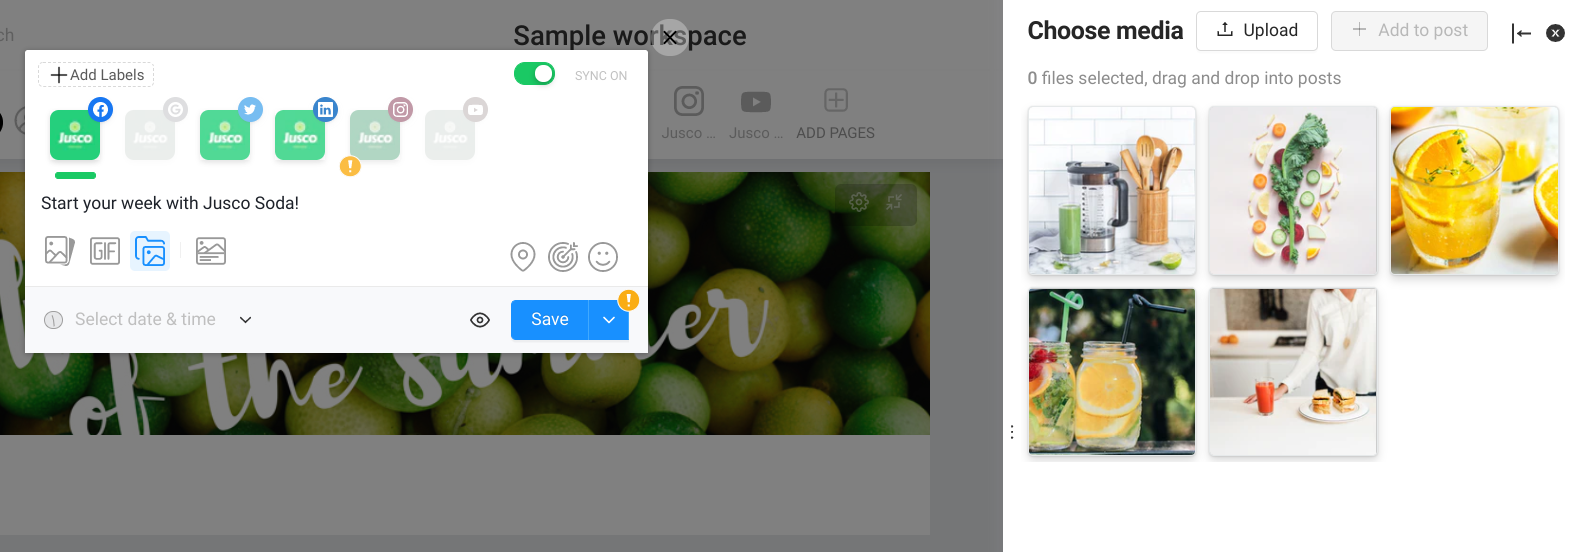
After adding your media file, you can turn the sync off and edit the posts for each social network. For instance, if you click on Instagram, Planable lets you choose whether it’s a regular post, story, or IGTV.
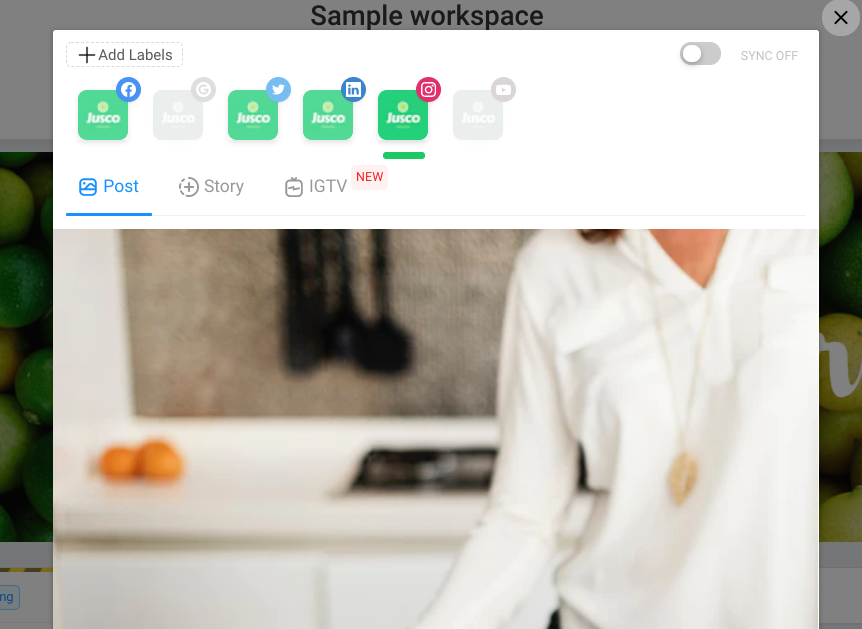
Beyond that, the platform adjusts your media size to each social network’s specifications. So, there’s no need to worry about the image size.
Apart from adding media to your post, other options include specifying your location, targeting specific audiences, or adding an emoji. Of course, the options vary with the social platform.
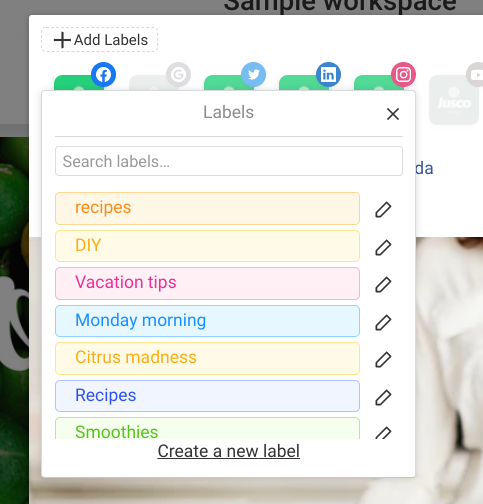
To categorize your posts more efficiently, Planable allows you to add relevant labels. Making it easy to differentiate between campaigns or content pillars.
When do you want to publish your post? Planable provides 3 options at the bottom of your post settings. These help to schedule your posts at your preferred times.
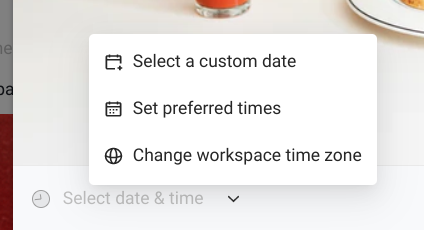
Once you complete the setup, you have the options to save, publish immediately, or schedule.
After creating your post, it will appear on your feed. Here, team members and clients can provide feedback about the post. For example, there’s a comment box just beside the post.
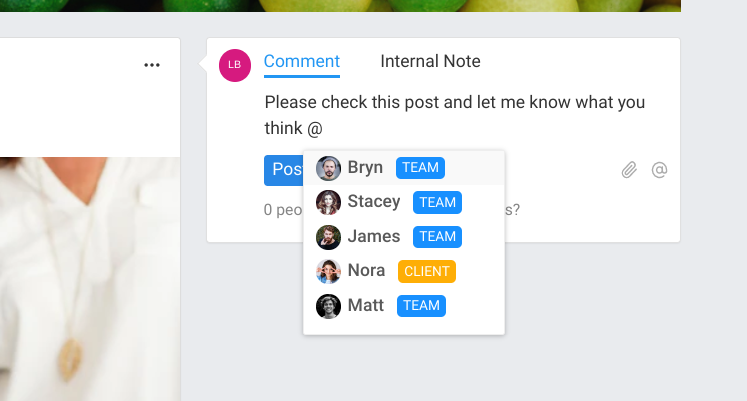
In the comment box, you can leave feedback and tag concerned team members. You also have the option to attach the necessary files. If you only want team members and not clients to see your comment, then leaving it as an internal note achieves that.
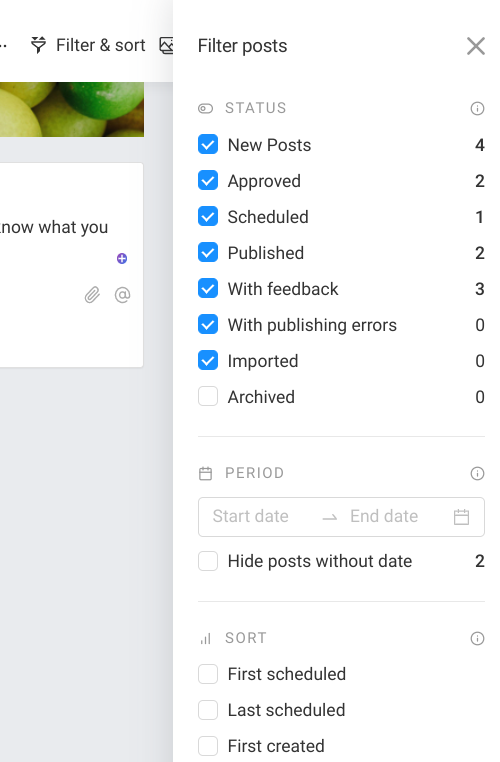
Another essential feature is the “Filter and sort” at the top right corner of your page. With this feature, you can sort your posts based on different criteria.
In the post, there are more options you can explore. Click on the 3 dots at the top right corner of the post to see these options.
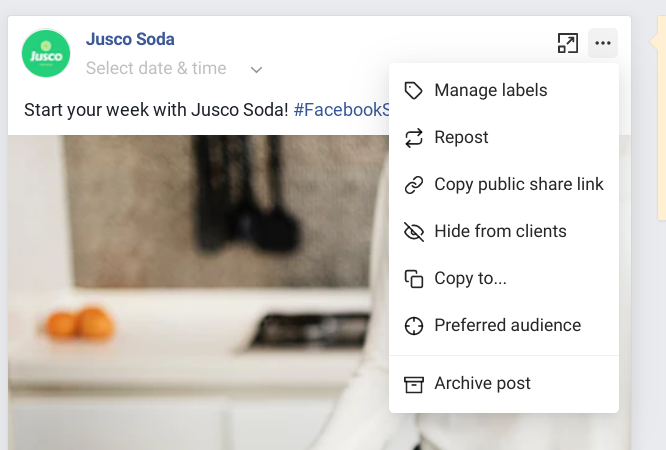
While you’re still editing your post with team members, you’ll prefer clients don’t see it. In that case, the “Hide from clients” option will be handy. Since this is a Facebook post, you can specify a preferred audience before publishing.
On the left side of the post, you’ll see the approval button and the social media channel button.
Want AI doing the heavy lifting in your marketing?
I build the systems that handle the boring 80 percent, so you get your week back. Done properly, with the human kept in.
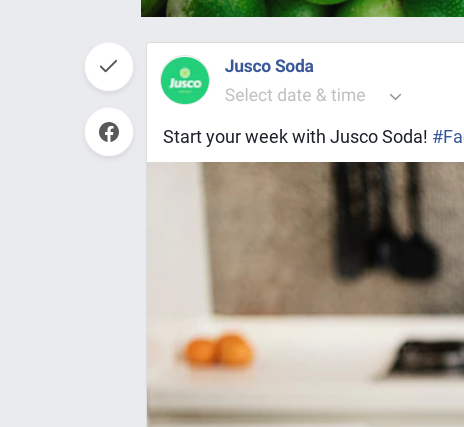
As mentioned earlier, you can edit the approval workflow according to your needs. If you’re working with a client, you have the option to request their approval before you publish.
Post views on Planable
On Planable, you get 4 different views for your posts. These are:
- Feed view
- Calendar view
- List view
- Grid view
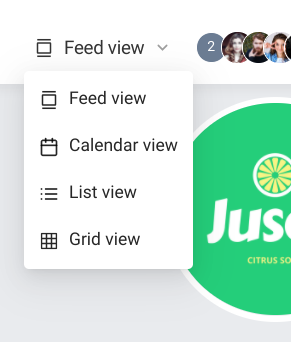
All these views serve their functions for effective social media scheduling and collaboration. I’ll mention some of them shortly.
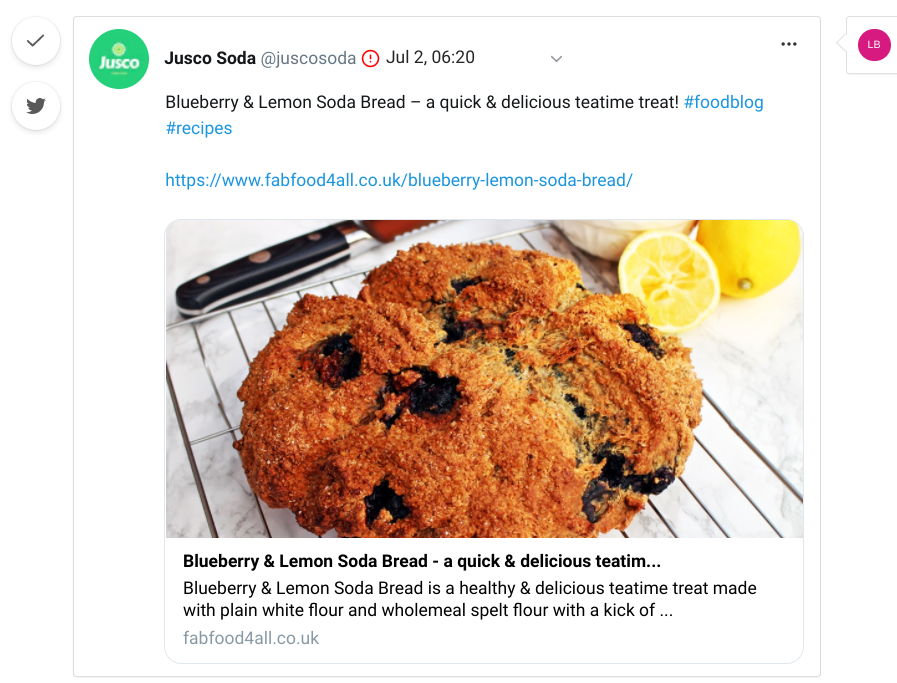
First, the feed view shows how your post will look on each social media channel. So, before you publish, you’ll see how your audience will view your posts.
By seeing this, you can adjust your captions and images until you get the right view for your audience. For instance, here’s the feed view for Twitter:
The calendar view meets your planning needs. One way to get results from social media is to publish consistently. What better way to do that than plan on a calendar?
This way, you can see an overview of your posts for a month. To switch to this view, click on the drop-down at the top left corner and select “Calendar view” among the options.
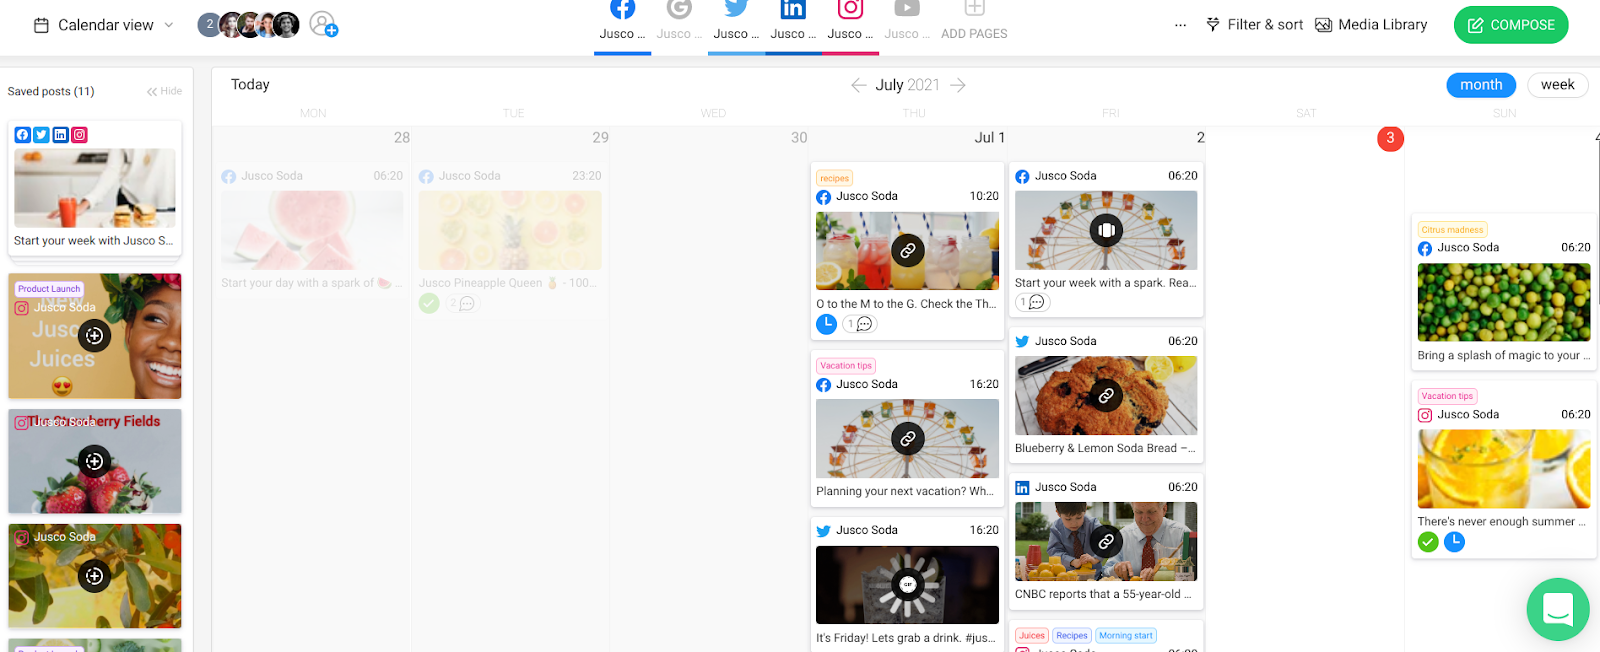
On this page, you’ll see posts for each date of the month. When you scroll further down the page, there are more posts for the rest of the month.
At the left sidebar of the page, there are saved posts. Of course, you can switch to the weekly view if you want to see a smaller time frame. Just click on “week” at the top right corner of the page to do so.
Beyond that, you can create a post without leaving the calendar. All you have to do is navigate to an empty date and hover your mouse on it. You’ll see “+ New post” at the top.
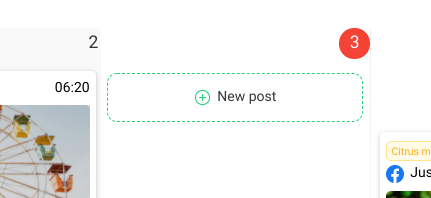
Clicking that will trigger the content creation popup.
The list view allows you to take quick actions on one or more of your social media posts. To access this view, select “List view” from the drop-down at the top left corner.
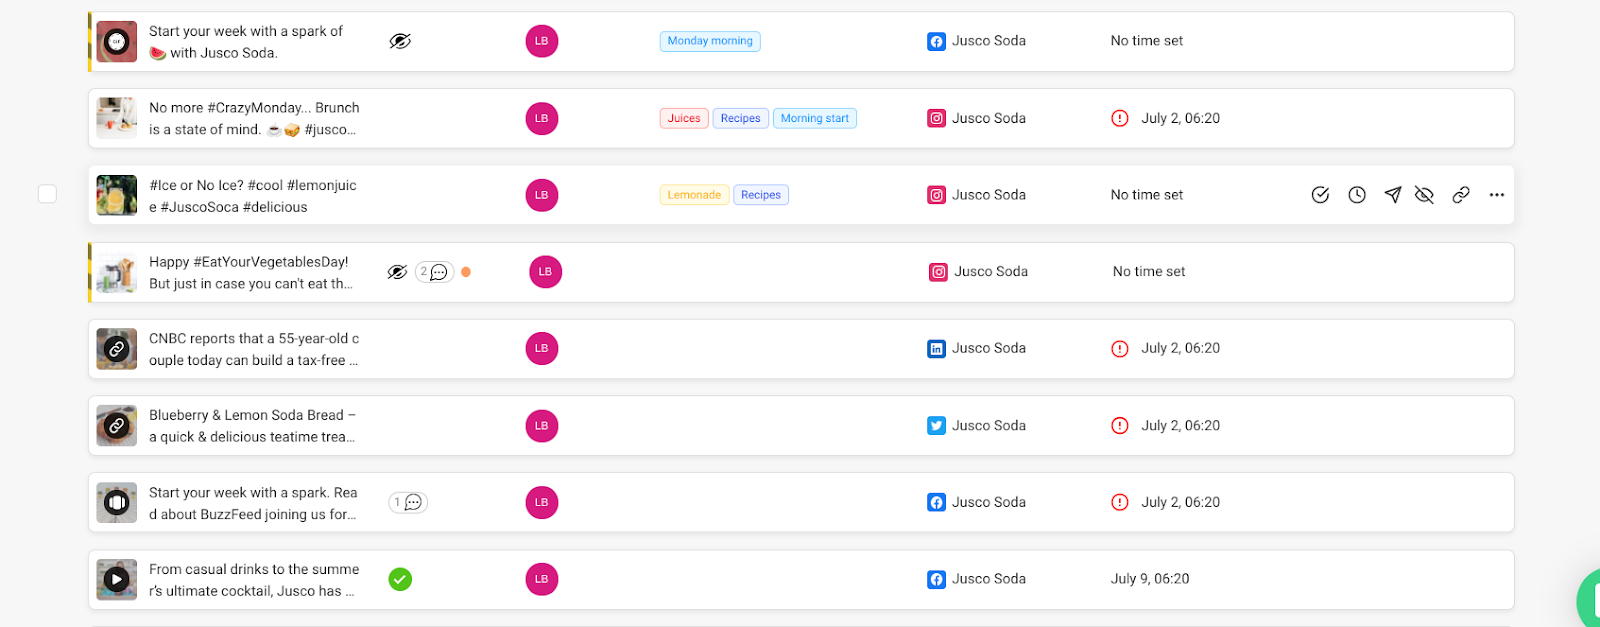
At the left side of your posts, you can select multiple posts. Doing this will bring up options at the bottom of the page.
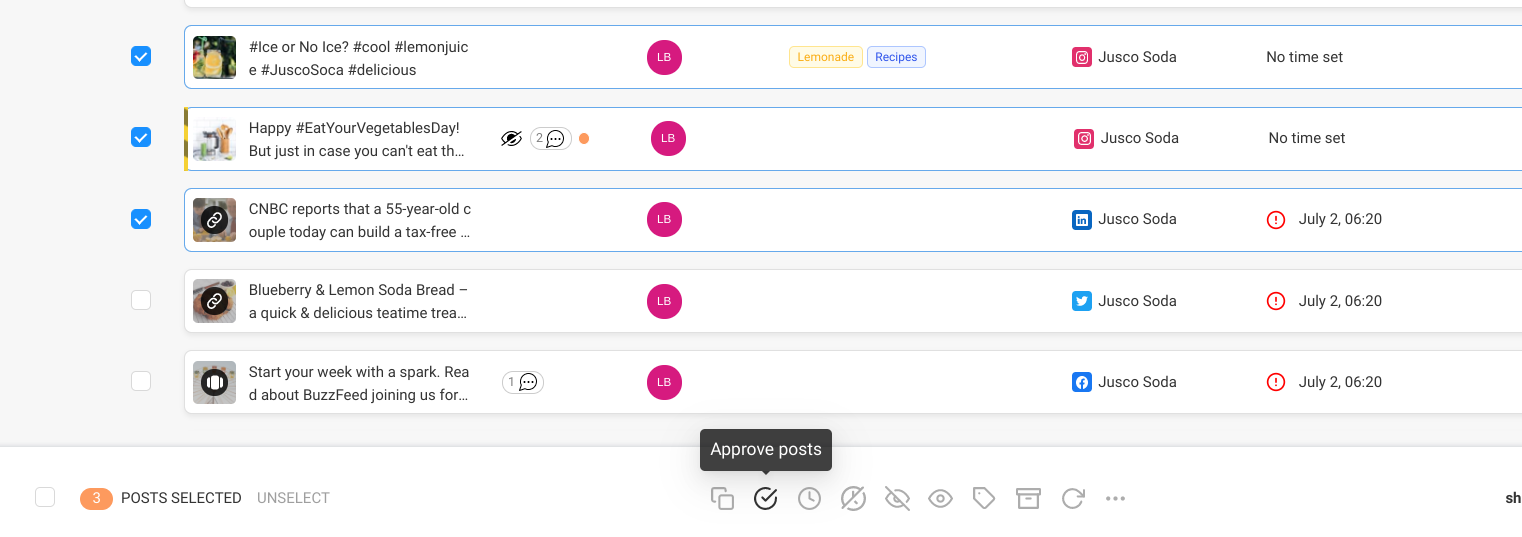
There are options such as copying the post to another workspace, approving posts, hiding from clients, making visible to clients, and more. For instance, if you’ve created separate workspaces for your clients, you can copy posts they need to approve to those workspaces.
Beyond that, you can access these options beside each post.
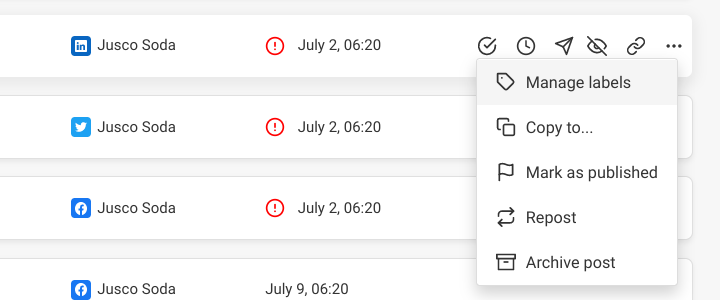
Furthermore, Planable allows you to view both desktop and mobile versions of your posts. Click on a post on your list to see the versions.
Lastly, the grid view allows you to see your posts in the grid format. This view is especially handy for Instagram posts.

It’s easy to see how your profile will look based on your posts. Besides, you can create an Instagram theme by rearranging your posts to fit a pattern. This can keep users on your profile longer and encourage them to follow your account.
Another feature you’ll love is the ability to create stories here. Just click on “Create new story,” and you can set up your Instagram stories.
Planable mobile app
The reality is that some workers rarely sit with their computers during work hours. As a result, social media marketers may need to edit and publish posts on the go.
In another sense, clients may need to approve posts on the go. This is why the iOS and Android mobile apps are vital to using this tool.
Fortunately, there’s an intuitive app that makes executing tasks easy.
Customer support
Planable offers customer support through 2 main channels:
- Help Center
- Chat
Luckily, you can access both channels from your account. You’ll find the chat button at the bottom right corner of your page, while the “Help” icon is at the top right corner.
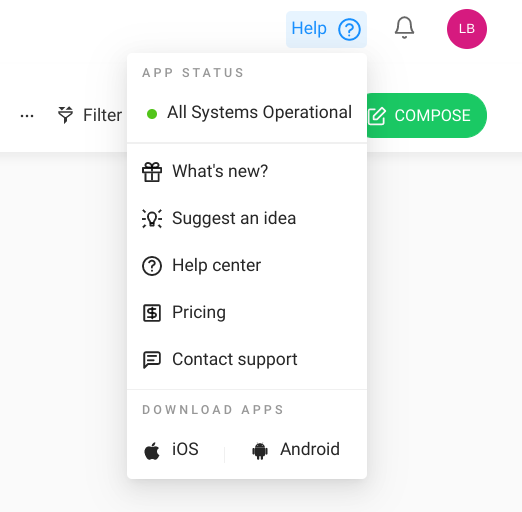
Through these channels, you can get your problems across to the Planable team or find solutions in the help center.
Planable pricing
How much does Planable cost? It depends on your needs and the plan that meets them. Here are the 4 plans available in the tool:
- Free: this is for teams that want to try Planable before making a commitment.
- Starter: this plan costs $39 monthly. If you pay annually, that goes down to $33.
- Premium: the premium plan costs $99 monthly. For an annual subscription, the cost reduces to $83.
- Enterprise: to get a price for this plan, you have to contact the Planable team.
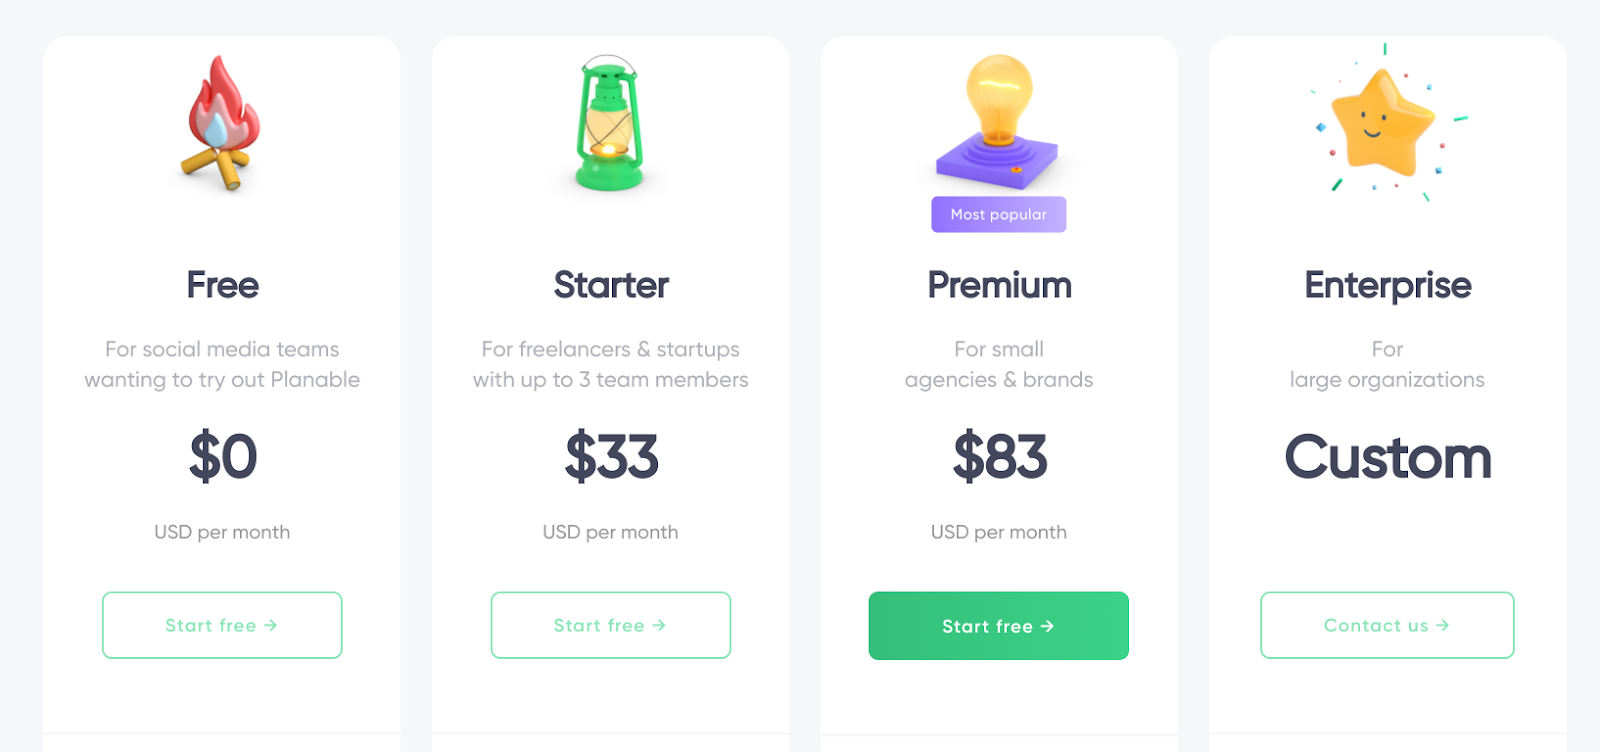
To get more details about the features for each plan, you can visit the Planable pricing page.
If you plan or brainstorm with people in different places, my roundup of the best online whiteboard tools compares the options.
Conclusion
Inevitably, social media teams need to collaborate while creating social content. And if you have clients, you need to get their approval before publishing posts.
Unfortunately, you have to use 2 or 3 tools to achieve this in the past. With Planable, however, you can schedule your social media posts as well as collaborate with team members and clients.
I’ve been really impressed with Planable, their combined features make it a no brainer for any marketer or business looking to manage and grow their social media. Check out their free plan here and see why it’s the easiest collaboration tool on the planet!
What's changed by 2026: AI in social media team workflows
Team collaboration on social media has changed substantially since 2022. AI tools now sit inside most workflow chains. Worth knowing what holds up from earlier advice and what needs revisiting.
AI-assisted drafting is now in the workflow
By 2026 most social media teams have AI in the workflow at some stage — drafting first-pass captions, generating image variants, scheduling time suggestions. The collaboration question has shifted from "who drafts the post" to "who reviews and edits the AI draft" and "who decides what the post should say at all." Roles matter more clearly now. Treat the AI as a junior team member that produces drafts; senior humans still pick topics and approve content.
Brand voice documents are now operational tools, not deck filler
In 2022 brand voice guides lived in a slide deck nobody read. In 2026 they get fed into AI prompts and meaningfully change output quality. Teams that have invested in a clear brand voice document (with examples of good and bad phrasing) get materially better AI-assisted drafts. Teams without one get generic AI output that doesn't match their brand.
Approval workflows have collapsed in length
2022 approval chains often had 3-5 stages and took days. By 2026 the best teams operate on 2-stage approval (creator + senior approver) with most posts reviewed within hours. The reason: AI handles the drafting work that used to need junior review, so senior review can happen earlier and faster. Long approval chains are now seen as a brand risk indicator (suggests low team trust or compliance overhang).
Tool stack rationalisation
In 2022 a typical social media team stack had: scheduler + analytics + asset manager + brand approval tool + listening tool + reporting dashboard. By 2026 most of these have collapsed into 1-2 platforms with built-in AI features. Teams that haven't consolidated still have the bloated stack and the integration tax.
What collaboration tools I actually use in 2026
- Shared text doc: for monthly content themes and brand voice notes. Plain text beats any specialised app.
- The native platform: for posts (LinkedIn especially favours in-app posting in 2026).
- Claude or AI assistant: for caption variations, hashtag research, repurposing.
- Direct Slack/messaging: for approval. Not a dedicated approval tool.
Want more on this topic?
Related: what a genuine product review looks like
The short version: Collaborating with social media teams and clients gets messy fast when feedback lives in emails, texts, and scattered comments. The fix is a single shared workspace where content, approvals, and communication happen in one place. Fewer tools and fewer back-and-forth messages mean faster approvals and happier clients.
Frequently asked questions
What's the biggest challenge when collaborating with clients on social media?
The biggest challenge is usually approval delays caused by scattered feedback across email, text, and phone calls. When comments live in different places, things get missed, deadlines slip, and content goes out late or unapproved.
What tool helps with social media collaboration?
A shared social media management platform with built-in approval workflows works best. It lets clients review and approve posts directly, team members comment in context, and everyone sees the same version of the content calendar.
How do I get clients to give feedback faster?
Make it easy by putting the approval process in one place they check regularly, with clear deadlines and simple approve or request-changes buttons. The less effort it takes to respond, the faster clients will respond.
Can small teams use collaboration tools too, or are they just for agencies?
Small teams benefit just as much, if not more. A clear collaboration process prevents miscommunication even with just two or three people, and it scales easily as the team or client list grows.
Related reading: Zoho Social for Agencies: a better way to collaborate on social media and What Cloud-Based Productivity Tools Help Remote Teams Collaborate (Not Just Look Busy).